When you spot a white, brittle crust forming across the surface of your potting soil or coating the rim of a planter, your container is telling you that dissolved minerals have built up to risky levels. In small planters, water steadily leaves through foliage transpiration and surface evaporation, but synthetic fertilizer residues and tap water minerals stay behind. As these salts concentrate in the potting mix, they pull moisture away from tender feeder roots, leaving plants wilted even when the mix feels damp. Flushing, known horticulturally as leaching, washes those accumulated minerals out through the drainage holes with clean water before root damage becomes permanent.
Why Soluble Salts Accumulate in Small Pots
Every potted plant lives in a confined root zone with a limited volume of soil mix. When you feed your plants with synthetic fertilizers, you add soluble mineral salts such as ammonium nitrate, potassium chloride, and calcium phosphate. Municipal tap water adds its own continuous load of dissolved minerals, including calcium, magnesium, sodium, and chloride. While growing roots take up some of these elements, they rarely consume all of them. Warm indoor air, dry wind on an exposed balcony, and sun striking pot surfaces accelerate evaporation, leaving unabsorbed salts behind in the pore spaces of peat, coconut coir, or pine bark.
Over several weeks or months, the concentration of these dissolved ions in the remaining soil moisture climbs. In commercial greenhouses and soil labs, this is tracked as electrical conductivity (EC). Texas A&M AgriLife Extension notes that container media runoff generally remains safe for roots when electrical conductivity stays below 2.0 millimhos per centimeter (or 2.0 dS/m). Rutgers NJAES researchers note that optimal Pour-Through leachate levels for nursery crops in bark mixes generally sit between 0.6 and 2.0 dS/m.
When salt levels rise above these thresholds, osmotic pressure reverses. In healthy soil, water moves naturally from a moist, lower-salinity mix into root cells. Once the potting mix becomes saltier than the fluid inside the roots, moisture is drawn backward out of plant cells into the dry soil solution. This osmotic drought shrivels fine root hairs, leaving the plant unable to take up water or nutrients despite damp soil conditions.
Related guide: Pinching and Pruning Potted Herbs for Bushy Growth
Visual Signs on Leaves, Soil, and Pots
Salt stress often mimics under-watering, root rot, or insect damage. Checking both the plant foliage and the potting medium helps confirm that accumulated salts are the true culprit:
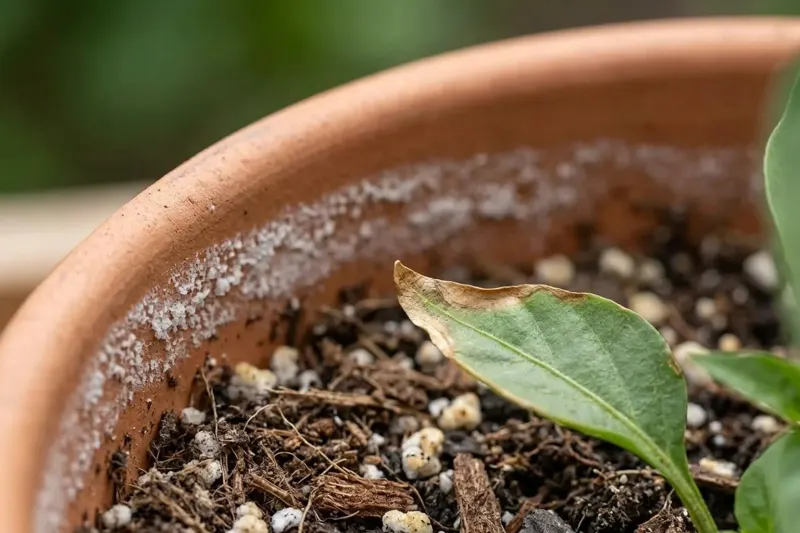
- **Surface and Rim Crust:** An off-white, crystalline powder or hard crust gathers across the top layer of potting mix, rings the inner plastic wall, or seeps through the porous exterior of unglazed clay pots.
- **Marginal Leaf Scorch:** Lower, older leaves develop crisp, pale brown or yellow edges and tips. Plants push water toward leaf margins through transpiration; when that water carries excess salts, those minerals concentrate in leaf edges and kill surrounding tissue.
- **Wilting in Moist Soil:** Foliage droops and stems lose turgor even though the potting mix feels cool and damp an inch below the surface. This happens because burned feeder roots can no longer absorb the moisture around them.
- **Brown Root Tips:** Sliding the plant gently from its container reveals fine feeder roots that look brown, brittle, or decayed near the bottom third of the root ball, rather than crisp, healthy white or cream.
- **Base and Hole Deposits:** Mineral scale crystallizes around bottom drainage openings where runoff water evaporates before clearing the planter.
Related guide: Timing Container Vegetables Using Local Frost Dates
Preparing the Container and Choosing Water
A successful flush requires two preliminary steps: clearing away the surface mineral crust and selecting water that will carry minerals away rather than adding more.
Start by removing the crusty top layer before pouring any water. If left in place, surface minerals dissolve and wash straight down through the root zone, concentrating the problem around the sensitive lower roots. For small indoor containers, University of Nebraska–Lincoln Extension recommends gently scraping away the mineral crust down to 1/4 inch (0.6 cm). Colorado State University Extension advises that on larger outdoor planters or deep containers with substantial root balls, you can safely remove 1/2 to 1 inch (1.3 to 2.5 cm) of surface media. Use a clean spoon or small hand fork, working carefully to avoid tearing shallow anchor roots.
Next, check the quality of your water source. Utah State University Extension and Colorado State University Extension caution against using artificially softened household water for container leaching. Home water softeners use ion-exchange resins that replace dissolved calcium and magnesium with sodium. Sodium is toxic to tender plant tissue and destroys soil structure, rapidly worsening salt stress. Use unsoftened tap water, collected rainwater, or filtered drinking water. Bring cold water to room temperature (around 65°F to 72°F or 18°C to 22°C) before pouring. Flushing a container with cold tap water can chill roots and trigger root cell shock.
Step-by-Step Leaching Guide
Leaching requires a deliberate volume of water rather than a standard garden watering. University of Nebraska–Lincoln Extension and University of New Hampshire Extension specify using a total volume of water equal to twice the volume of the container—a 2:1 water-to-pot ratio. A 1-gallon pot needs 2 gallons of water; a 6-inch pot holding roughly 5 cups of mix requires 10 cups of water.
To strip out minerals without washing your soil mix down the drain, divide the flush into distinct stages:
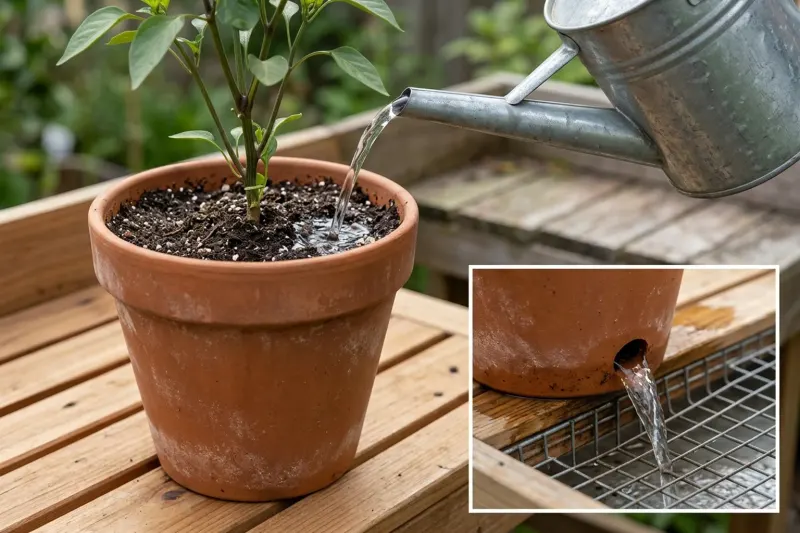
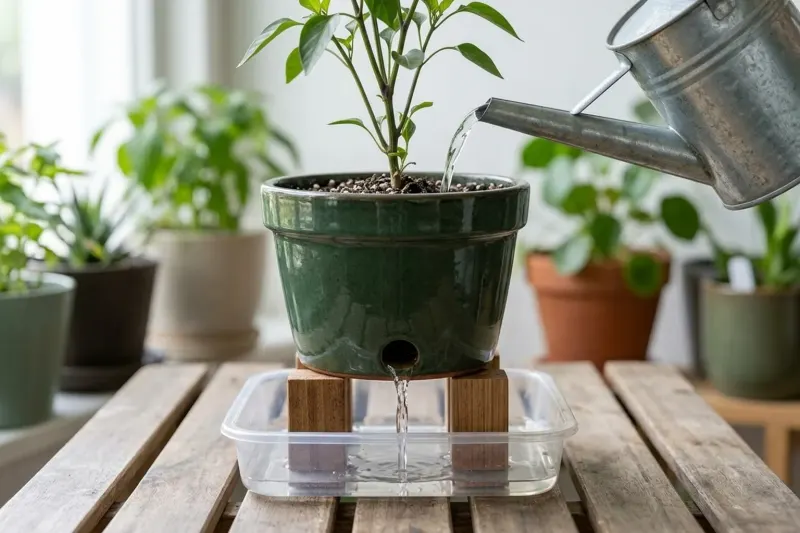
1. **First Saturation:** Move the container to a sink, bathtub, outdoor deck, or utility area with free drainage. Slowly pour half of your total water volume evenly across the soil surface. Let the water soak downward through the mix until it runs freely from the drainage holes.
2. **The Dissolution Dwell:** Stop pouring and let the pot sit undisturbed for about 5 minutes. As University of California Cooperative Extension explains, this brief rest gives stagnant pore water time to dissolve hardened mineral crystals clinging to organic peat, coir, and perlite particles.
3. **Final Rinse:** Slowly apply the remaining half of your measured water across the surface. This second volume catches dissolved ions in suspension and flushes them completely out of the container base.
4. **Drainage and Runoff Removal:** Let the pot drain freely for 20 to 30 minutes until dripping stops. Never allow the container to rest in standing runoff water inside a saucer. Texas A&M AgriLife Extension points out that potting mix will draw that salty runoff back up into the lower root zone like a sponge, reversing your work.
Post-Flush Recovery and Routine Prevention
Once drainage finishes, top-dress the potting mix with fresh, unfertilized potting soil to replace the scraped surface layer and protect exposed top roots from sun and drying air. Set the container back in its regular spot, checking that light levels and air circulation remain steady.
Because leaching saturates the entire potting profile, wet soil can temporarily restrict oxygen around root tissue. Colorado State University Extension advises holding off on watering after a leach until the root ball feels dry to the touch. Do not apply additional fertilizer immediately to stressed roots; instead, hold supplemental feeds until the media dries down and the plant establishes active, healthy root recovery.
To prevent mineral buildup from recurring, adjust how you water day to day. Texas A&M AgriLife Extension recommends applying a 15% to 20% leaching fraction during regular waterings. In practice, this means pouring enough water so that roughly one-fifth flows out through the drainage holes into the tray, and then dumping that saucer runoff promptly within 15 minutes. For actively growing container plants fed regular liquid fertilizer, UC Cooperative Extension suggests scheduling a preventative flush every 2 to 3 months, while UNH Extension recommends an interval of roughly every 4 months.
Salt Management Options by Symptom and Container Type
| Situation | Consider | Why |
|---|---|---|
| Thin white salt crust on the soil, but foliage remains green without leaf scorch or wilting | Scrape the top 1/4 inch (0.6 cm) of soil and apply a 15% to 20% leaching fraction during your next regular watering | Soluble salt levels are still modest; routine over-watering removes excess minerals before root cells suffer significant burn. |
| Visible surface crusting combined with crisp brown leaf margins and wilting in moist mix | Perform a complete 2:1 volume leach using a 5-minute pause between pours | High electrical conductivity requires an aggressive volume of clean water to dissolve and discharge concentrated salts. |
| Unglazed terracotta planter coated inside and out with heavy white salt scale | Scrub the outside with water and a stiff wire brush, then complete a standard soil flush | NC State Extension notes that minerals seep into porous clay; scrubbing removes surface deposits that can migrate back into the mix. |
| Heavy, oversized container on a balcony that cannot be moved to a sink or outdoor hose station | Apply flush water in measured increments while emptying the saucer repeatedly with a suction siphon or baster | Keeps mineral-dense runoff water from being reabsorbed by the lower root ball through capillary action. |
Hypothetical Worked Example: Leaching a 2-Gallon Container
Imagine an indoor Meyer lemon growing in an 8.5-inch diameter plastic container holding roughly 2.0 gallons (7.6 liters) of a peat-perlite potting blend. Over four months of indoor feeding, a chalky crust has coated the rim, and lower leaf tips have turned yellow-brown. To carry out a full leach based on the 2:1 water-to-container ratio, the grower prepares 4.0 gallons (15.2 liters) of unsoftened, room-temperature tap water. Working over a utility sink, they use a spoon to scrape away and discard the top 0.5 inches (1.3 cm) of crusty potting mix, keeping shallow roots intact. They slowly pour 2.0 gallons (7.6 liters) across the surface, watching runoff exit the base holes. After a 5-minute pause to let dried salts dissolve within the root ball, they pour the remaining 2.0 gallons (7.6 liters) in a steady stream. The container drains on an elevated wire rack for 25 minutes before receiving 0.5 inches of fresh, unfertilized potting mix over the surface. The plant is returned to its bright window, and the grower withholds all watering until the root ball feels dry to the touch.
- 11: Scrape Crust
- 22: Initial Pour
- 33: Five-Min Pause
- 44: Second Flush
When this approach is not a good fit
Do not attempt a standard heavy leach on pots that lack working drainage holes; saturating an undrained container leads to standing water, oxygen loss, and fatal root rot. Similarly, do not apply full flushes to plants already showing advanced fungal root rot, or to outdoor containers during unseasonably cold, wet weather when soil cannot dry out within a healthy window.
PUT THIS GUIDE TO USE
Work with your own measurements
Sources & further reading
- Colorado State University Extension - Leaching Salts from Potting Mixes
- University of California Cooperative Extension - Leach Your Houseplants
- University of Nebraska-Lincoln Extension - Success with Houseplants
- University of New Hampshire Extension - Fertilizing Houseplants
- Texas A&M AgriLife Extension - Managing Soluble Salts
- Utah State University Extension - Help for Houseplants
- North Carolina State University Extension - Plants Grown in Containers
- Rutgers NJAES - Media EC and Leaching
AI-assisted writing and concept images. Sources and automated checks support the process; they do not replace checking your own measurements.
How we create our guides · Suggest a correction