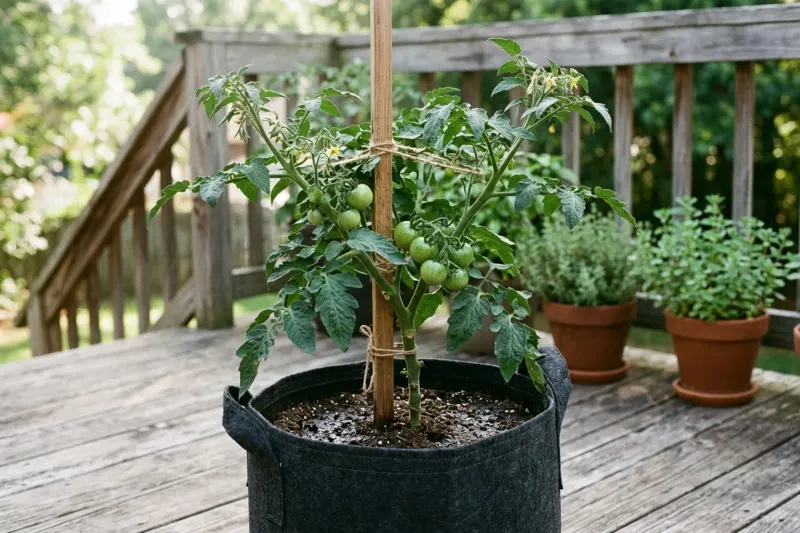
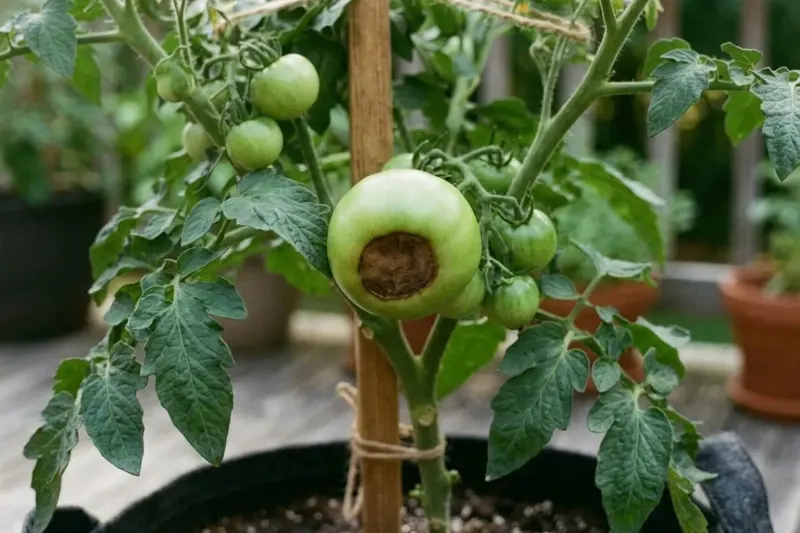
If you find a flat, leathery dark patch on the bottom of a green container tomato, your plant has blossom-end rot. It is not an infectious disease, a fungal blight, or insect damage, so you do not need to discard the vine or apply chemical fungicides. Blossom-end rot is an abiotic disorder caused by a localized calcium deficiency during rapid fruit cell expansion. In patio planters and fabric grow bags, potting mix usually contains sufficient calcium from dolomitic limestone. The problem almost always stems from uneven moisture that interrupts the upward water stream carrying calcium into developing fruit tips. Adjusting your watering routine, choosing appropriate container volumes, and avoiding unbalanced fertilizers will protect subsequent fruit clusters.
Spotting Symptoms on Developing Fruit
Blossom-end rot displays specific visual symptoms that distinguish it from common patio tomato problems like blights, anthracnose, or sunscald. The issue begins as a pale, water-soaked spot centered squarely at the blossom end—the fruit tip opposite the stem. This softening typically appears when the tomato reaches one-third to one-half its mature size, a window of intense cell division. As the fruit expands, the affected cells collapse, turning the spot into a sunken, leathery black or dark brown patch. Harmless saprophytic fungi may colonize the dead tissue later, producing a dark, velvety surface, but the rot itself is entirely non-pathogenic. Look for clear diagnostic clues: blossom-end rot remains confined to the fruit base, leaving foliage, stems, and upper fruit shoulders unblemished. Sunscald forms paper-thin, bleached white patches on fruit shoulders exposed to harsh afternoon sun. Early blight creates dark concentric rings near the stem end alongside yellowing, spotted lower leaves. Anthracnose produces soft, sunken circular depressions scattered across ripe fruit rather than a firm, dark patch on green fruit. Damaged fruit cannot heal because its cell structure is permanently ruined; pruning it off redirects water, sugars, and calcium to unaffected upper clusters.
Related guide: Flushing Fertilizer Salts from Container Potting Mix
How Moisture Swings Block Calcium
Understanding calcium transport explains why container tomatoes are particularly vulnerable to blossom-end rot. Unlike nitrogen, phosphorus, or potassium, calcium is immobile once deposited in plant tissues. The plant cannot pull stored calcium from older foliage to nourish new fruit. Instead, calcium travels upward exclusively through xylem vessels via the transpiration stream, which is the water column pulled upward as moisture evaporates through leaf pores called stomata. This mechanism creates competition between leaves and developing fruit. Mature foliage contains thousands of stomata per square centimeter, generating strong suction under sunny skies. Developing green tomatoes have a waxy skin with few stomata, resulting in minimal transpirational pull. Under steady moisture, root pressure and transpiration supply adequate calcium to both leaves and fruit tips. In containers, however, potting mix dries out much faster than ground soil. When hot balcony winds or skipped waterings dry the root zone, the plant closes its stomata to conserve water, which halts the upward movement of calcium. Because the blossom end of the fruit is farthest from the roots and possesses the weakest suction, its rapidly expanding cells starve first. Without calcium to form calcium pectate—the binding agent in plant cell walls—the cell walls collapse, creating the sunken patch.
Related guide: Pinching and Pruning Potted Herbs for Bushy Growth
Container Volume, Substrates, and Watering Habits
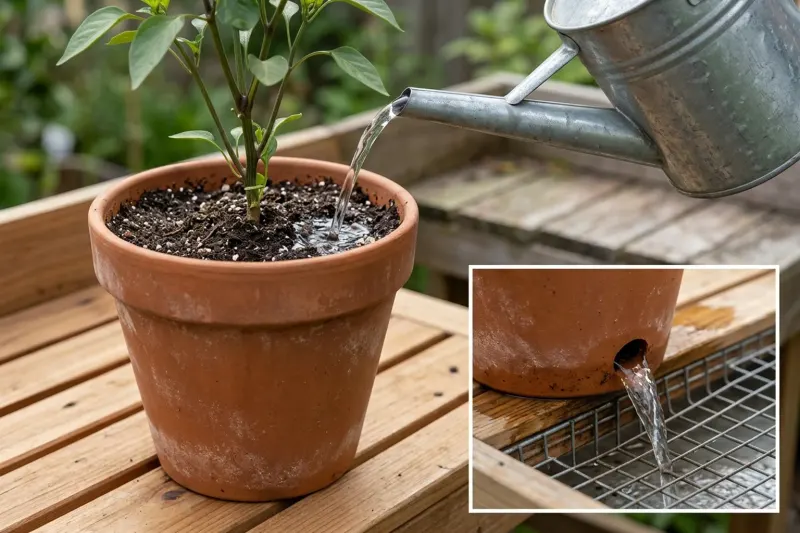
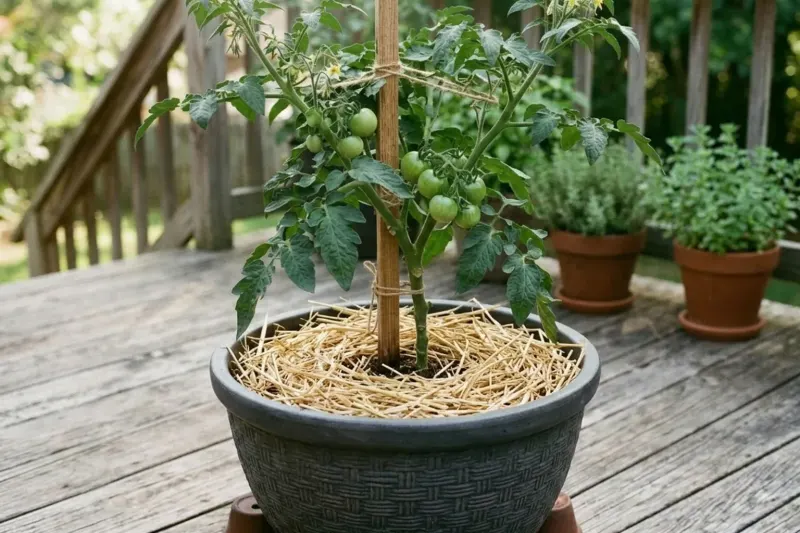
Because moisture stability governs calcium transport, container size and watering discipline are your main defenses against blossom-end rot. Full-sized indeterminate and determinate tomato cultivars develop extensive root systems that quickly outgrow small pots. Confining a standard tomato to a 2-gallon or 3-gallon (7.5-liter to 11.4-liter) pot causes severe wet-and-dry swings during hot weather. Cooperative extension specialists recommend a minimum container volume of 5 gallons (19 liters) per plant, with a soil depth of 10 to 12 inches (25 to 30 cm) for standard slicing and paste tomatoes. Compact dwarf varieties can grow in 3-gallon (11.4-liter) containers, though larger volumes provide a safer moisture buffer. Check containers daily, and twice daily during hot weather above 85 degrees Fahrenheit (29 degrees Celsius). Push a finger 2 inches (5 cm) into the potting mix, watering thoroughly when the top inch feels dry. Apply enough water so roughly 10 to 15 percent drains out the bottom holes to ensure full saturation and leach out residual salts. Keep containers on pot risers so drainage holes stay clear, since water pooling in saucers suffocates root hairs and blocks calcium uptake. A 1- to 2-inch (2.5 to 5 cm) layer of clean straw or shredded bark mulch moderates soil evaporation during summer heat waves.
Related guide: Preventing Root Rot in Container Herbs
Fertilizer Mistakes That Interfere with Calcium
Gardeners often assume blossom-end rot requires pouring calcium supplements into the soil. However, commercial peat- and coconut-coir-based potting mixes already contain supplemental calcium carbonate from dolomitic limestone. The problem frequently stems from nutrient competition, in which excessive levels of other fertilizer salts prevent roots from absorbing calcium. Positively charged calcium ions compete directly with other cations for absorption sites on root membranes. Excess potassium, magnesium, or ammonium nitrogen displaces calcium at the root surface. Using heavy doses of high-nitrogen fertilizers dominated by ammonium or urea salts creates a double penalty: ammonium ions suppress calcium uptake, while the burst of nitrogen stimulates rapid leaf growth. That dense canopy of foliage transpires heavily, drawing available calcium away from fruit clusters. To balance container nutrition, select fertilizers where nitrogen is supplied primarily as nitrate rather than ammonium. Avoid high-potassium bloom boosters during early fruit set. Maintain a potting media pH between 6.2 and 6.8; if the pH falls below 5.5, calcium binds chemically to the mix and becomes unavailable to roots. Never apply Epsom salt (magnesium sulfate) as a home remedy, because adding unneeded magnesium directly worsens calcium exclusion at the root level.
Why Sprays and Folk Cures Fall Short
When blossom-end rot strikes, gardeners often try quick remedies or foliar sprays. University extension trials consistently confirm that these methods fail to resolve the underlying physiological issue. Foliar calcium sprays offer negligible benefit because calcium is immobile in plant phloem; leaves cannot move absorbed minerals to developing fruit. Spraying the fruit directly does not help either, as green tomatoes have a thick, waxy cuticle designed to retain water, which prevents topical absorption. Similarly, adding crushed eggshells or antacid tablets to active container soil does not provide timely relief. Raw eggshells consist of coarse calcium carbonate, which requires months or years of microbial decomposition and chemical weathering before releasing plant-available ions. In a single-season container, eggshell fragments remain inert. Effective prevention relies on steady watering, adequate container volume, well-draining media, and balanced fertilization. Cultivar selection also matters: elongated paste tomatoes like Roma and San Marzano are genetically prone to blossom-end rot because of their rapid lengthwise cell expansion. If your container location experiences high heat and drying winds, choosing round slicing cultivars or cherry tomatoes provides greater resilience against moisture fluctuations.
Diagnostic and Corrective Action Matrix
| Situation | Consider | Why |
|---|---|---|
| First fruit cluster shows dark, leathery bases while potting mix dries out completely by mid-afternoon. | Prune off damaged fruit, add a 1.5- to 2-inch organic mulch layer, and divide watering into morning and early afternoon sessions. | Damaged fruit cannot repair collapsed cell walls; steady moisture ensures continuous calcium transport to newly forming clusters. |
| Potting mix stays waterlogged, saucer holds standing water, and fruit shows sunken blossom ends. | Empty the saucer, elevate the pot on risers, and let the top inch of mix dry slightly before watering again. | Saturated roots suffocate from lack of oxygen, preventing root hairs from taking up dissolved calcium. |
| Foliage grows dense and dark green after using high-ammonium fertilizer, followed by blossom-end rot on green fruit. | Switch to a fertilizer supplying nitrogen primarily as nitrate, reducing total nitrogen during fruit set. | Nitrate does not compete with calcium for root uptake sites, whereas ammonium suppresses calcium and fuels leafy growth that diverts water from fruit. |
| Peat-based potting mix tests below pH 5.5 using a calibrated meter or lab soil test. | Top-dress with agricultural dolomitic limestone at package label rates or repot into a balanced commercial mix. | In substrates below pH 5.5, calcium binds chemically to soil particles and becomes unavailable to root hairs. |
Hypothetical Moisture Management on an Exposed Balcony
Consider a single indeterminate tomato plant grown in a 5-gallon (19-liter) plastic container measuring 12 inches (30 cm) wide and 12 inches (30 cm) deep on an exposed south-facing balcony. During summer weather between 85°F and 90°F (29°C to 32°C), a mature plant can transpire an estimated 0.5 to 0.75 gallons (1.9 to 2.8 liters) of water daily. If watered only once every other day, the container dries out by noon on the second day, stalling xylem flow and starving expanding fruit cells of calcium. To stabilize moisture, the grower adds a 1.5-inch (3.8 cm) layer of shredded bark mulch to lower surface evaporation. Watering is split into two daily sessions: roughly 0.35 gallons (1.3 liters) at 7:30 AM and 0.35 gallons (1.3 liters) at 1:30 PM, adjusted so about 10 percent drains freely from the base. Within two weeks, newly setting fruit develops with firm, unblemished blossom ends. Local weather, wind exposure, and pot material will alter exact daily watering amounts.
- Drainage saucer with risers
- 5-gallon (19 L) pot rim
- Surface straw mulch layer
- Central stem and stake support
When this approach is not a good fit
This moisture stabilization protocol is unsuitable for managing infectious foliar blights, viral infections, bacterial cankers, or fruit rots that originate near the stem shoulder, such as early blight. It also does not apply to closed recirculating commercial hydroponics or rockwool slabs, where nutrient solution electrical conductivity and pH must be monitored with specialized lab equipment.
PUT THIS GUIDE TO USE
Work with your own measurements
Sources & further reading
- UGA Extension: Blossom-End Rot and Calcium Nutrition of Pepper and Tomato
- UConn Home & Garden Education Center: Blossom-End Rot
- MSU Extension: Blossom-End Rot of Tomato Tip Sheet
- University of Minnesota Extension: Soil Health Home Remedies
- Clemson Cooperative Extension: Tomato Diseases & Disorders
- Colorado State University Extension: Vegetable Gardening in Containers
AI-assisted writing and concept images. Sources and automated checks support the process; they do not replace checking your own measurements.
How we create our guides · Suggest a correction