Moving tender vegetable seedlings directly from an indoor grow light or windowsill to an open balcony railing leads to bleached sunscald, snapped stems, and chilled roots. Indoor seedlings grow in still air, constant humidity, and filtered light, producing thin leaf blades, delicate cellular walls, and a sparse protective waxy cuticle. Transitioning them outdoors—a horticultural conditioning process called hardening off—requires 7 to 14 days of gradual exposure to outdoor elements before transplanting into permanent planters. Porches and balconies present unique microclimate hurdles, including turbulent wind funnels between structures, rapid radiant heat loss at night, and quick moisture evaporation from small starter pots. By establishing a sheltered transition station against a solid exterior wall and pacing sunlight and wind exposure day by day, you can prepare warm- and cool-season starts for high-exposure outdoor container life without stalling their growth.
Temperature Minimums and Crop Readiness
Before carrying your seedling flats outside, confirm that your starts are physiologically mature and that local outdoor air meets safe temperature thresholds. South Dakota State University (SDSU) Extension notes that vegetable seedlings should possess at least 3 to 4 true leaves before facing the stress of outdoor breezes and fluctuating humidity. Initial seed leaves, or cotyledons, lack the photosynthetic reserve and root anchoring capacity needed to handle sudden shifts in outdoor vapor pressure. Different crops carry distinct thermal thresholds. North Carolina State Cooperative Extension notes that warm-season crops, including tomatoes, peppers, eggplants, and squash, require outdoor daytime temperatures of at least 45°F to 50°F (7°C to 10°C) before beginning exposure. If daytime forecasts stay below 45°F (7°C), warm-season transplants must stay inside under lights. While cool-season vegetables like brassicas and leafy greens tolerate lower temperatures than warm-season starts, gardeners should consult their local cooperative extension for crop-specific planting windows rather than relying on generalized outdoor dates. Container volume significantly influences thermal stability. A young plant in a 5 cm to 7.5 cm (2-inch to 3-inch) plastic starter cell holds very little potting mix. Unlike open garden soil that retains deep subterranean warmth, small root plugs chill to ambient air temperatures rapidly when cold drafts pass through balcony balusters. Chilled roots absorb water and dissolved nutrients slowly, which can stall plant development even if the midday air feels comfortable to you.
Related guide: Mapping Balcony Sun Hours for Container Crops
Sheltered Balcony Zones for Early Days
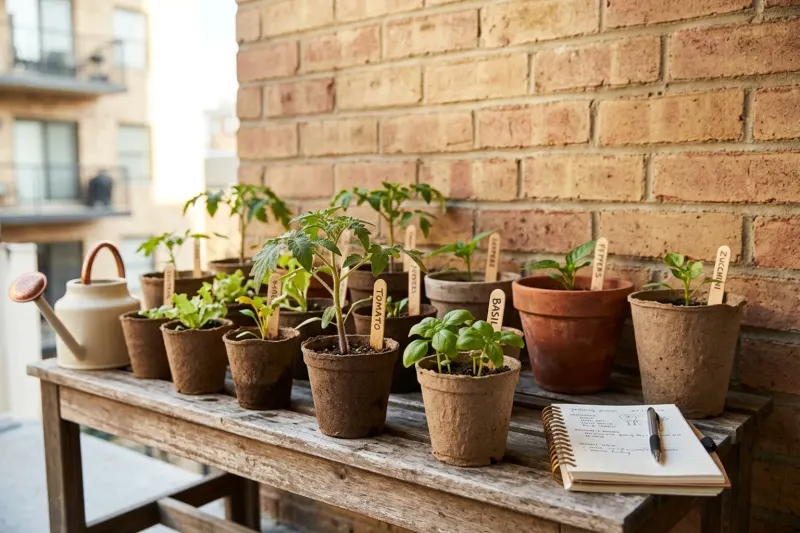
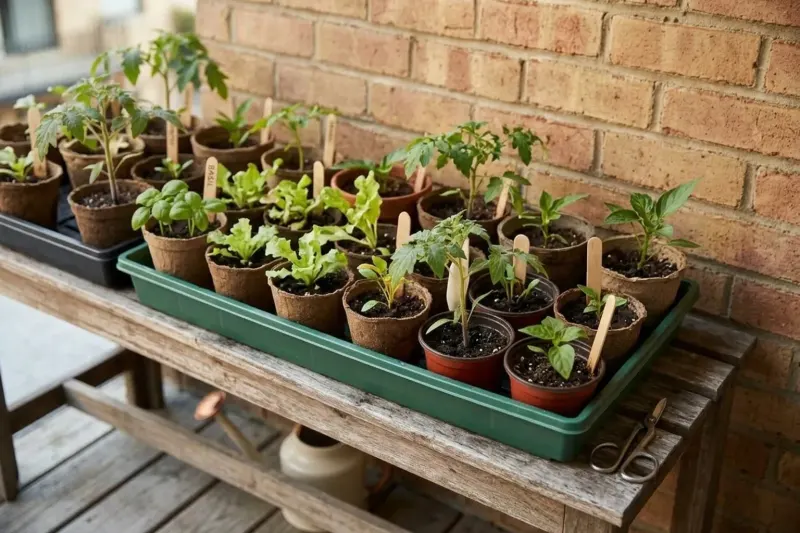
Balconies and porches develop pronounced local microclimates that differ dramatically from standard ground-level garden plots. Upper-floor apartment balconies face higher wind velocities because tall building facades catch and redirect moving air currents downward. In contrast, covered ground-level porches frequently trap pockets of damp, stagnant cold air under their ceilings. Finding a safe intermediate staging area is critical to prevent broken stems and leaf desiccation during early outdoor visits. Cornell Cooperative Extension and Michigan State University Extension advise using sheltered positions under an overhead cover, such as beneath a porch roof, under an upper balcony overhang, or set directly flush against an exterior building wall. Exterior brick, stone, and stucco surfaces absorb solar warmth throughout the day and gradually release radiant heat, establishing a mild boundary layer that protects tender leaves from sudden downdrafts and localized temperature drops. Avoid placing seed flats directly on bare concrete balcony slabs or metal floor decking. Cold floor materials pull heat directly from the bottom drainage holes of nursery cells, chilling root zones early in the morning. Instead, elevate your flats on a sturdy wooden bench, a low wooden crate, or an outdoor folding table positioned well back from the perimeter railing. Balcony railings experience maximum wind shear and intense, unfiltered ultraviolet light, making the rail edge completely unsuitable for seedlings during the first five to seven days of hardening.
A Stepwise Balcony Exposure Routine
Acclimating indoor seedlings is a cumulative physiological process that cannot be rushed without risking foliage damage. University of Illinois Extension recommends beginning the transition with 2 to 3 hours in a sheltered, shaded location during the warmer afternoon hours, whereas Seed Savers Exchange recommends starting with 1 hour of filtered shade for vegetable starts. Over a 7- to 14-day transition period, gradually increasing outdoor exposure builds durable cellular walls and strong vascular tissue. On Days 1 and 2, place your seedling flats in bright, complete shade directly against the building wall for 1 to 2 hours during the early afternoon, roughly between 12:00 PM and 3:00 PM, when outdoor air is warmest. Shield the flats completely from drafts, and return them indoors under grow lights for the rest of their daily light cycle. On Days 3 and 4, extend outdoor exposure to 3 or 4 hours. Position the tray to catch mild, early-morning sunlight before 10:00 AM, then slide it back into deep wall shade for the remaining hours before bringing the flats inside ahead of sunset. On Days 5 and 6, increase the window to 5 or 6 hours outdoors, allowing 2 to 3 hours of direct morning sun while checking cell moisture around midday. Keep the flats sheltered from afternoon gusts by setting them near an exterior corner or solid privacy panel. On Days 7 and 8, leave seedlings outside for 8 to 10 hours, moving them into midday sun if wind conditions remain calm. On Days 9 and 10, if nighttime temperatures remain above the species threshold—holding above 45°F to 50°F (7°C to 10°C) for warm-season vegetables as advised by North Carolina State Cooperative Extension—leave the containers outdoors overnight against the sheltered wall. Once plants endure 24 to 48 continuous outdoor hours without wilting, they are ready for planting into permanent containers.
Related guide: Protecting Balcony Container Vegetables from Wind
Moisture Management and Fertilizer Restraint
The physiological purpose of hardening off is to prompt defensive adaptations within plant cells. SDSU Extension explains that gentle outdoor breezes and varying light stimulate plant stems to synthesize lignin, which stiffens structural cell walls, while foliage develops a thicker waxy outer cuticle to reduce water loss through transpiration. Balancing moisture during this window requires careful observation. SDSU Extension advises reducing watering frequency slightly during the hardening period to encourage sturdier tissue development. However, container cell packs lose moisture outdoors far more rapidly than in still indoor rooms. Outdoor breezes and direct solar radiation draw water out of small potting soil volumes within a few hours. Allow the surface of the potting mix to turn pale and dry between waterings, but never allow the soil plug to shrink away from the container edges or let the leaves reach a limp, irreversible wilt. Watering flats from below by pouring shallow water into the bottom drainage tray allows root balls to rehydrate without drenching fragile foliage. Nutrient management during this transition requires strict restraint from nitrogen fertilizers. Applying nitrogen right before or during the hardening process forces rapid, succulent leaf expansion. This soft growth lacks thickened cuticle layers, making it exceptionally vulnerable to wind whipping and solar scorching. Withhold all liquid and granular fertilizers until your transplants have adjusted to outdoor conditions and have been potted into their final containers for at least one week.
Reading Foliage Signals and Managing Weather Setbacks
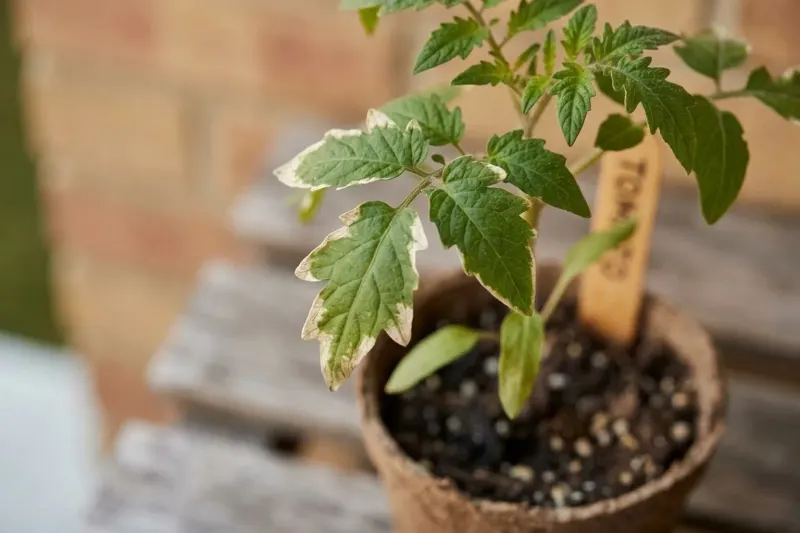
Observing foliage closely each afternoon helps you identify abiotic stress before it turns into permanent tissue damage. Sunscald appears as silvery, bleached, or papery white patches across the upper surfaces of leaves. This damage occurs when foliage lacks sufficient protective pigments and cuticle thickness to process unfiltered outdoor ultraviolet rays. If white patches develop, immediately return the tray to complete shade for 48 hours, pausing the daily progression and extending the overall timeline by three to four days. Cold stress frequently manifests in warm-season starts like tomatoes and peppers as purple discoloration along main leaf veins and the undersides of foliage, signaling that chilly substrate temperatures have temporarily impaired nutrient uptake and root metabolic activity. When purpling occurs, move the flats to a warmer, more sheltered zone out of cold drafts until vigorous green growth resumes. Wind desiccation causes leaf edges to cup upward, curl inward, or turn crisp along the margins even while the potting mix remains moist, signaling that dry moving air is stripping moisture from the foliage faster than young roots can replenish it. When curling appears, move flats behind solid planters or indoors to rehydrate. Whenever severe weather strikes—such as high wind gusts, pelting rain, or sudden frost warnings—suspend the acclimation schedule completely. Bring flats indoors under grow lights until conditions stabilize. When resuming the outdoor schedule, restart at the exposure duration used two days prior rather than jumping immediately to an advanced exposure stage.
Balcony Placement and Exposure Decisions
| Situation | Consider | Why |
|---|---|---|
| Overcast sky with mild outdoor air between 55°F and 65°F (13°C to 18°C) | Keep seedlings outside for the full scheduled duration without protective cloth | Cloud cover naturally filters ultraviolet light while allowing stems to adapt to ambient air movement and outdoor temperatures. |
| Balcony wind gusts that whip seedling stems or threaten to tip over starter packs | Shift flats down to floor level flush against the building wall or bring them indoors | Indoor-grown stems lack rigid structural lignin and snap easily or experience severe desiccation from fast-moving air currents. |
| Nighttime temperature forecast drops below 45°F (7°C) for warm-season vegetable crops | Bring all warm-season seedling flats indoors before dusk | Cold potting substrate below 45°F chills root systems of tomatoes and peppers, causing nutrient lockup and prolonged growth stunting. |
| Foliage displays pale white, bleached patches after initial sunlight exposure | Return seedling flats to full shade for 48 hours and extend the transition schedule by 3 to 4 days | Bleached spots indicate solar scorch from ultraviolet exposure; resting in shade prevents cellular collapse and gives plants time to repair tissue. |
Worked Example: Hardening Balcony Tomato Transplants
Consider a hypothetical scenario of an urban gardener acclimating six 'Patio Choice' tomato starts in 7.5 cm (3-inch) plastic starter cells on an east-facing balcony measuring 200 cm (79 in) wide by 120 cm (47 in) deep. Baseline local conditions show daytime highs around 64°F (18°C) and nighttime lows near 52°F (11°C). On Day 1, the gardener sets the seedling flat onto a low wooden riser 20 cm (8 in) off the floor, tucked directly against the brick apartment wall from 1:00 PM to 2:30 PM (1.5 hours) in complete shade. On Day 4, the flat sits in gentle morning light from 8:30 AM to 12:30 PM (4 hours), receiving approximately 1 hour of direct early sun before the upper balcony overhang shades the space. The gardener inspects soil moisture at 11:00 AM and adds shallow water to the bottom tray to offset surface evaporation. By Day 8, the flat stays outside for 8 hours, including 3 hours of direct morning sun. On Day 10, with nighttime forecasts projected at 53°F (12°C), the containers remain on the balcony overnight in the wall-sheltered zone prior to final planting into 19-liter (5-gallon) patio containers.
- Building Wall Buffer (Thermal Mass and Windbreak)
- Early Staging Flat (Days 1–3 Shade)
- Mid-Phase Flat (Days 4–7 Morning Light)
- Walkway and Maintenance Clearance
- Exposed Railing Zone (Days 8+ Sun and Air)
When this approach is not a good fit
This gradual outdoor acclimation protocol is unsuitable for direct-seeded root vegetables such as carrots, radishes, or turnips that should not undergo transplanting, bare-root nursery stock, or during sudden late-spring frost warnings when temperatures drop below 32°F (0°C). Seedlings with fewer than three true leaves must remain indoors under lights until their root mass and leaf surfaces develop sufficient resilience.
Sources & further reading
- University of Illinois Extension
- South Dakota State University Extension
- North Carolina State Cooperative Extension
- Cornell Cooperative Extension
- Michigan State University Extension
- Seed Savers Exchange
AI-assisted writing and concept images. Sources and automated checks support the process; they do not replace checking your own measurements.
How we create our guides · Suggest a correction