
Quick Answer: A stuck Milwaukee M18 drill chuck is almost always caused by overtightening, debris accumulation, a seized keyless mechanism, or a damaged spindle lock. In most cases, you can release it using strap wrench counter-rotation, penetrating oil treatment, or the chuck removal procedure. This guide covers every method — including when the fix is impossible without a rebuild.
There's a particular kind of frustration that settles in when you're mid-project, drill in hand, and the chuck simply will not open, much like the annoyance of troubleshooting PS5 Error CE-108255-1 when your console fails unexpectedly. It doesn't budge. You twist harder. Nothing. You tap it on the workbench. Still nothing. If this is happening with your Milwaukee M18 — one of the most popular cordless drill platforms on the market — you're dealing with something that's more common than Milwaukee's marketing materials would suggest, and significantly more nuanced than most YouTube tutorials acknowledge.
The M18 platform is genuinely excellent hardware, though even the best tech requires maintenance, similar to how one might need to force a successful descale cycle on a Keurig K-Supreme when it stops functioning correctly. But "excellent" doesn't mean "immune to mechanical failure," and the keyless chuck on the M18 FUEL and standard M18 lines has a specific set of failure modes that the community has been quietly documenting for years in places like the Milwaukee Tool subreddit, the ContractorTalk forums, and the Home Depot reviews section where the one-star feedback tends to be more technically detailed than anything you'd find in a press release.
This isn't a simple "turn it counterclockwise" problem, and much like creating a smarter strategy for early retirement, you need a nuanced approach to avoid long-term complications. The mechanics of why a chuck gets stuck — and more importantly, which type of stuck you're dealing with — determines everything about how you approach the fix.
Why Milwaukee M18 Chuck Mechanisms Seize: The Mechanical Reality
Before you grab tools, you need to understand what you're actually dealing with inside that chuck assembly, a process as diagnostic as fixing a Shark RV1001AE Error 8.
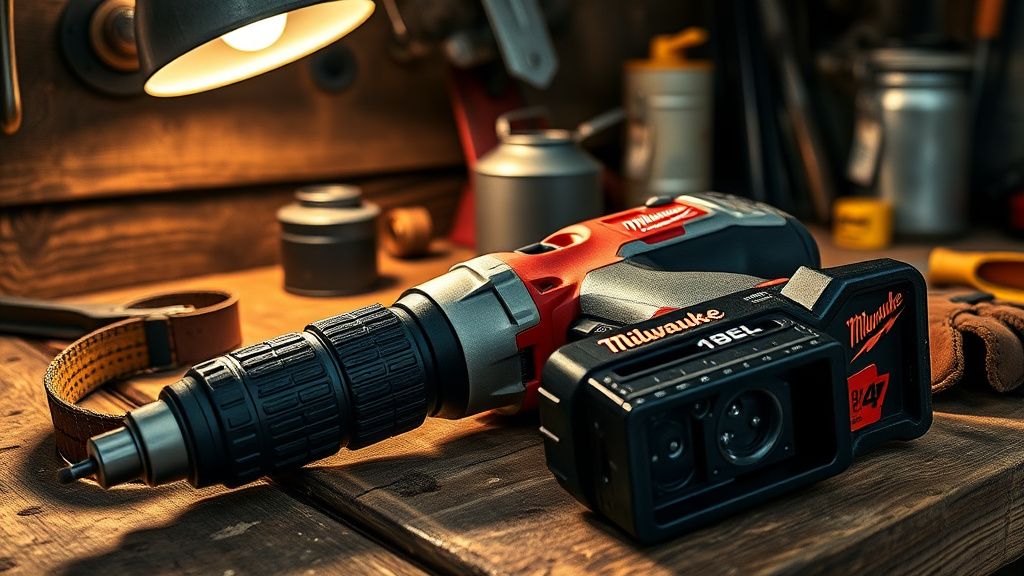
The Milwaukee M18 ships with a keyless chuck — typically a Jacobs-style or proprietary Milwaukee-sourced unit depending on the generation and model variant. The keyless chuck operates through a sleeve mechanism that translates rotational movement from your hand into radial jaw movement inside the chuck body. Three hardened steel jaws expand and contract along a threaded scroll plate, operating with a level of precision that requires careful handling—not unlike the technical considerations involved in building a private LLM server with consumer GPUs.
Here's where failure enters the picture.
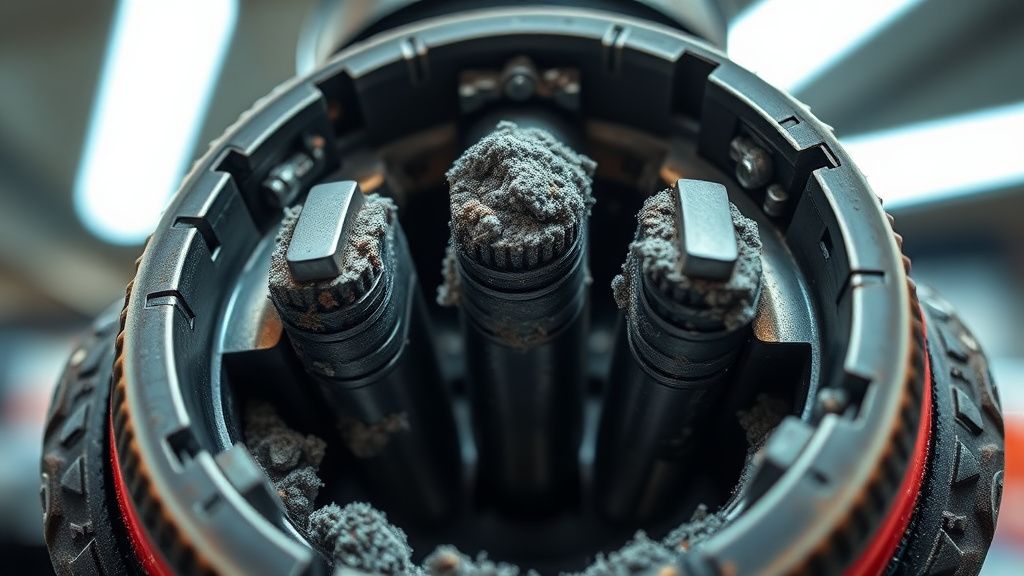
Debris and Swarf Accumulation in the Scroll Mechanism
Every time you drill into masonry, metal, or even certain treated woods, fine particles migrate backward. The keyless chuck design — despite its convenience advantage over keyed chucks — has inherent gaps in the sleeve-to-body interface. Over months of real use, a mixture of metal shavings, wood dust, concrete grit, and cutting fluid residue builds up inside the scroll mechanism, which can cause failures just as frustrating as experiencing Wi-Fi 7 mesh dead zones in your home. It doesn't jam immediately. It compresses gradually until one day the jaw movement stops entirely or locks mid-travel.
This is the most common failure mode. It's mechanical contamination, not a design defect per se, but Milwaukee's chuck ventilation and sealing on many M18 variants is objectively minimal compared to industrial-grade drill platforms. Users on r/MilwaukeeTool have noted this repeatedly: "Fine concrete dust from hammer drilling killed my chuck in under a year. The chuck worked fine, then one day it just... stopped."
Overtightening and Cold Weld Effect
The second major cause is operational: overtightening. When you tighten a drill bit with aggressive hand force — particularly on a slipping bit where the instinct is to "really crank it down" — you can generate enough clamping force that the steel jaws temporarily cold weld to the bit shank, especially if there's any moisture present. Cold welding in this context isn't full metallurgical bonding, but the microscopic surface contact under extreme pressure creates enough adhesion to make release by hand effectively impossible.
This happens more often with smooth-shank drill bits. Hex shank bits in a standard round-jaw chuck are particularly prone to this because the flat surfaces of the hex interact with the jaw geometry in ways that can create localized pressure concentration.
Spindle Lock Engagement Under Load
The M18's spindle lock mechanism — the feature that locks the chuck during bit changes — can partially engage during use if the lock button is worn or the internal detent mechanism has debris around it. When the spindle lock partially engages while the chuck is being tightened, the rotational energy that should go into closing the chuck jaws instead goes into binding the lock mechanism. The result: a chuck that feels "tight" but isn't actually seating the bit correctly, and subsequently cannot be released because the lock and jaw system are mutually fighting each other.
Damaged or Worn Chuck Body Threads
On older M18 units or drills that have been dropped repeatedly, the internal threaded interface between the chuck and the spindle can develop wear or impact damage. This is a different class of problem — the chuck isn't just stuck in terms of the jaws, the entire chuck assembly may be seized or cross-threaded onto the spindle. This distinction matters enormously for how you approach the repair.
Real Field Reports: What Actually Happens Out There
The gap between how tool problems are described in repair manuals and how they actually manifest in field conditions is significant.
A plumber in a Reddit thread from early 2023 described a scenario that's representative of many similar reports: his M18 Compact drill had been used extensively for drilling through concrete block for conduit runs, using SDS-adjacent masonry bits in the standard chuck. The chuck had been gradually stiffening over several months. One morning it simply locked. The bit was stuck inside. The sleeve wouldn't rotate in either direction. He tried channel-locks — the sleeve deformed slightly but didn't release. He eventually removed the chuck entirely and found the scroll plate packed with a cement-gray paste roughly the consistency of dried spackling compound.
A finish carpenter on the ContractorTalk forum had a different scenario: his M18 FUEL chuck locked with a bit inside after he'd been using it to drive pocket screws in cold weather. Sub-freezing temperatures had caused slight dimensional changes in the steel components that, combined with an already slightly overtightened bit, made the chuck effectively immovable. He didn't know about penetrating oil treatment and ended up buying a replacement chuck unnecessarily.
An electrician described what is arguably the most frustrating variant: a chuck that opens and closes fine with no bit installed, but seizes every single time a specific style of smooth round-shank bit is used. This edge case — intermittent seizing specific to one bit type — took him three months to diagnose. The solution was changing bit suppliers, not repairing the drill.
These aren't outliers. They're typical of the operational friction that doesn't get documented in product reviews but accumulates quietly in forums.
The Professional Release Methods, In Order of Aggression
Work through these sequentially. Starting with the most aggressive method is how people strip chuck sleeves and turn a fixable problem into a parts-replacement job.
Method 1: The Directional Reversal Test
Before anything else, this costs nothing and takes fifteen seconds.
Ensure the M18's transmission is set to drill mode (not hammer, if applicable). Hold the chuck sleeve firmly with your non-dominant hand and activate the drill briefly in reverse. The torque from the motor fighting your grip on the sleeve creates rotational force that sometimes breaks a minor bind.
This doesn't work on cold-welded bits or severely compacted scroll mechanisms. But it works surprisingly often on chucks that have simply overtightened from use without true contamination. It's the first thing Milwaukee's own repair technicians try.
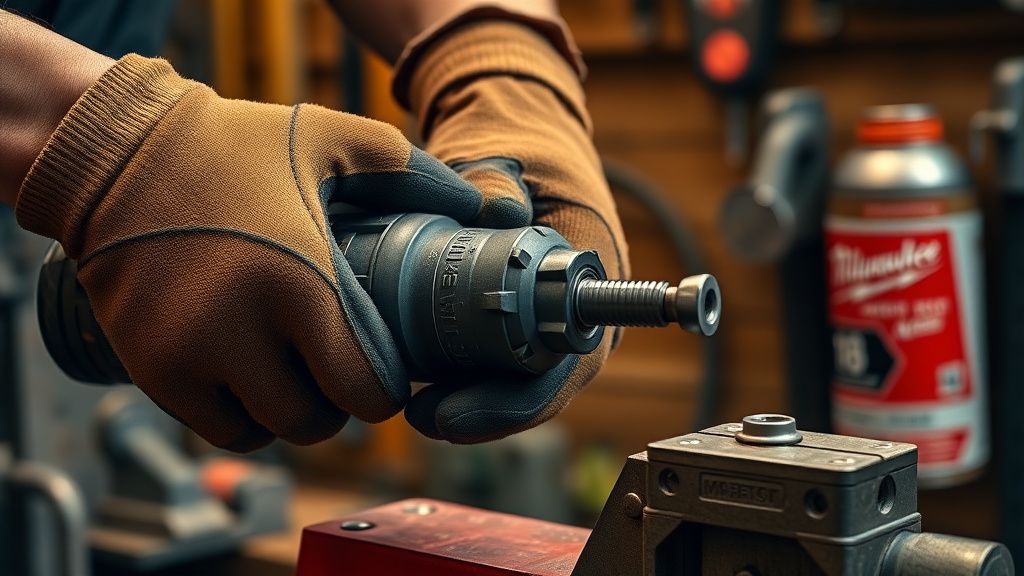
Method 2: Strap Wrench Counter-Rotation
A rubber strap wrench or a purpose-made chuck wrench gives you mechanical advantage without the metal-on-metal contact that damages the sleeve finish and can distort the softer aluminum or plastic components.
Procedure:
- Remove the battery from the M18. Critical — always work on unpowered tools.
- Engage the spindle lock button.
- Wrap the strap wrench around the chuck sleeve as close to the chuck body as possible.
- Apply slow, sustained counter-clockwise (loosening) pressure while maintaining spindle lock engagement.
- If the chuck doesn't move within reasonable force, stop. Increasing force past this point risks spindle lock damage.
The strap wrench approach resolves overtightened situations reliably. It's less effective against contamination-based seizure.
Method 3: Penetrating Oil Treatment
For contamination-based seizure, you need a penetrating oil capable of reaching the internal scroll mechanism. PB Blaster, Kroil, or WD-40 Specialist Penetrant (not standard WD-40, which is primarily a water displacer and light lubricant, not a penetrant) are the appropriate products.
Procedure:
- Remove the battery.
- Hold the drill with the chuck facing upward.
- Apply penetrating oil around the junction between the chuck sleeve and chuck body — the gap where the sleeve meets the fixed chuck body.
- Wait. Minimum thirty minutes. For severe contamination, overnight is better.
- Work the sleeve back and forth with your hands — not trying to fully open, just introducing micro-movement to help the penetrant wick through the mechanism.
- Repeat oil application and wait cycle if necessary.
- Once movement returns, flush the chuck with clean penetrating oil to remove the loosened contamination paste.
Important caveat: Do not use this method if the chuck seize is spindle lock related. Oil introduced near the spindle lock mechanism can reduce lock engagement effectiveness, creating a safety hazard during future bit changes.
Method 4: Targeted Impact with Controlled Vibration
Vibration breaks contamination bonds that static force cannot. This is the method that seems counterintuitive — you're effectively shocking the chuck mechanism.
Use a rubber mallet, not a steel hammer. With the battery removed and the drill resting securely on a non-marring surface, deliver firm, repeated taps to the side of the chuck body while someone else attempts sleeve rotation. The vibration propagates through the scroll mechanism and can fracture the debris crust that's preventing movement.
Do not strike the chuck jaws directly. Do not use this method if you suspect thread damage between the chuck and spindle — vibration will worsen cross-threading.
Method 5: Thermal Cycling
Steel and aluminum have different thermal expansion coefficients. A stuck chuck that involves dissimilar metal components can sometimes be freed by rapid thermal cycling.
Apply a bag of ice to the chuck assembly for ten to fifteen minutes. The aluminum components cool and contract faster than the steel scroll mechanism components. Immediately after the cold treatment, attempt sleeve rotation. Some technicians follow this with a brief application of warm (not hot) air from a heat gun to the outer chuck sleeve, then another rotation attempt.
This is a technique borrowed from seized bolt removal. It works on some cases, does nothing in others, and should not be used if the drill will be returned for warranty service as the thermal stress can complicate failure analysis.
Chuck Removal: When the Chuck Itself Is the Problem
If none of the above methods restore function, or if your diagnosis indicates thread-level seizure between the chuck and spindle, you're looking at full chuck removal. This is where things get technical and where most DIY repair attempts go wrong.
Understanding the Milwaukee M18 Chuck Thread Convention
Milwaukee M18 drills use a right-hand threaded chuck mounted on the spindle, with an additional left-hand threaded retaining screw inside the chuck. This is a near-universal convention in cordless drills but one that catches people off guard every time.
The retaining screw, accessed through the open chuck jaws, tightens clockwise and loosens counterclockwise from the perspective of looking down the chuck throat — but because it's left-hand threaded, this means you turn it clockwise to remove it. Yes, this is the opposite of what every instinct tells you. Stripping this screw by turning it the wrong direction is one of the most common self-inflicted damage events in drill repair.
Chuck Removal Procedure:
- Remove the battery.
- Open the chuck jaws fully.
- Look inside the chuck throat — you'll see a Phillips or Torx head screw at the base.
- Using the correct bit (often T20 or T25 Torx, check your specific M18 variant), turn clockwise to remove the left-hand threaded retaining screw.
- Engage the spindle lock.
- Place a hex key (Allen wrench) — typically 6mm — into the chuck jaws and tighten it firmly.
- Using a mallet, strike the long end of the hex key in the clockwise direction (when viewed from the front). This is counterintuitive: you're striking clockwise to loosen the chuck from the spindle because you're working against the right-hand thread from the back.
- Once the chuck breaks free, unscrew it by hand counterclockwise.
This procedure has a meaningful failure rate when the chuck-to-spindle interface is corroded or damaged. Applying penetrating oil to the spindle junction and waiting before attempting the hex key strike significantly improves success rates.
Counter-Criticism: Is This Actually a Milwaukee Problem?
It's worth being honest about the debate here.
Some experienced tradespeople argue that chuck seizure at this scale is primarily user error — overtightening, improper bit selection, using standard drill chucks for applications that demand SDS, and failure to perform basic maintenance. Their position has merit. A keyless chuck that's cleaned and lubricated at reasonable intervals — which most users never do — is substantially more resistant to contamination seizure.
On the other side of this argument: Milwaukee's chuck quality on certain M18 variants, particularly earlier generation M18 Compact models, has been criticized in professional communities as below what the price point implies. The ContractorTalk threads on this are lengthy and occasionally heated. The argument isn't that Milwaukee makes bad drills — it's that the chuck is sometimes the weakest component in a very good drill, and that Milwaukee's response to chuck warranty claims can be inconsistent. Some users report warranty replacements processed without question. Others report being told the damage is "user-caused" based on inspection findings that the user couldn't verify or dispute.
This asymmetry of information — Milwaukee's technicians can see chuck damage details the user can't — creates a legitimate trust problem that shows up regularly in user discussions. It's not necessarily bad faith on Milwaukee's part, but it's a dynamic that disadvantages the consumer.
Preventive Maintenance: The Things Nobody Does Until After It Breaks
The preventive maintenance protocol for keyless chucks is simple enough that it's genuinely frustrating how rarely people follow it.
Monthly if used frequently:
- Open the chuck fully and blow out the interior with compressed air.
- Apply a small amount of dry lubricant (PTFE-based) or light machine oil to the scroll mechanism. Not WD-40.
- Work the chuck through its full range several times.
After heavy masonry or metal drilling:
- Compressed air flush immediately after use, before the swarf compacts.
- Visual inspection of the jaw faces for embedded particles.
Before storing:
- Never store a drill with a bit tightly clamped in the chuck. The sustained clamping pressure over days or weeks contributes to cold-weld style seizure.
This is genuinely basic. It's also genuinely ignored by the vast majority of users, including many professionals who know better.
When Replacement Is the Right Answer
Not every stuck chuck is salvageable with field repair techniques. The indicators that you should move toward chuck replacement rather than continued repair attempts:
- Chuck sleeve deformation from previous repair attempts with channel-lock pliers
- Visible crack in the chuck body
- Jaw alignment visibly off after freeing (one jaw advancing faster than others)
- Chuck releases but no longer maintains consistent bit grip
- Spindle damage visible after chuck removal
Replacement chucks for Milwaukee M18 models are available through Milwaukee's service network and aftermarket. The key specifications to match are the thread size (typically 1/2"-20 UNF for the standard M18) and the chuck capacity (1/2" for most M18 variants, 3/8" for the compact models). Getting this wrong is the most common parts-ordering error.